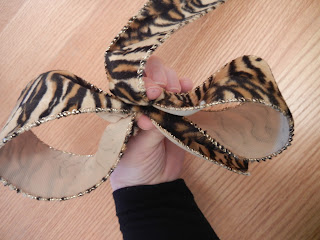
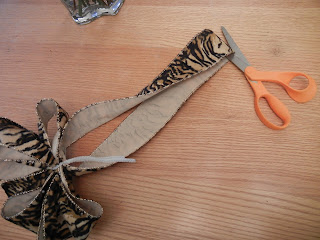
Step #1 - Supplies needed:
ribbon (at least 3-5 yards), scissors, and pipe cleaners or wire
Step #2 - Hold several inches of the end of your ribbon between your thumb and fingers.
Twist once.
Step # 3 - Make a loop with ribbon (about 3-4 inches long depending on how wide your ribbon is) and then twist once. Do this on the other side as well. Then twist once. Keep going back and forth adding a loop and then twisting once each time. Keep this held together tightly between your thumb and fingers.
Note: For demonstration purposes I used wide/one-sided ribbon and added 3 loops to each side of my bow.
So...you'll loop then twist...
Loop then twist...
Back and forth...several times..
I did 3 loops on each side....
Step # 4 - Once your loops are made you may want to add tails or streamers that hang down from your bow. To do this you make 1 large loop and twist.
Step # 5 - Run a pipe cleaner or wire through the center of where you are tightly holding all of the twists together and then pull the sides of the pipe cleaner down towards the big loop (tails). Twist as TIGHTLY as possible! You may even want to tighten with wire cutters to make sure all of the ribbon is secure and won't slip out of the grip of the wire. If it does ...your bow will fall apart.
Step # 6 - Pull down on the tails/streamers and cut in half.
Then fold the ribbon in half to cut the decorative points in the ends.
Cut in half....
Then fold and cut again...
Step # 7 - Pull, straighten, and fluff the loops of your bow.
Pull the tails/streamers to the center of the bow.
You are Done!!
Here is our long stemmed rose arrangement from the last post ....finished off with our beautiful bow. Very nice!


No comments:
Post a Comment
Leave me a comment!